Workflow (Legacy) with Sequential Steps
Workflow can be chained to run one after another in a specific sequence.
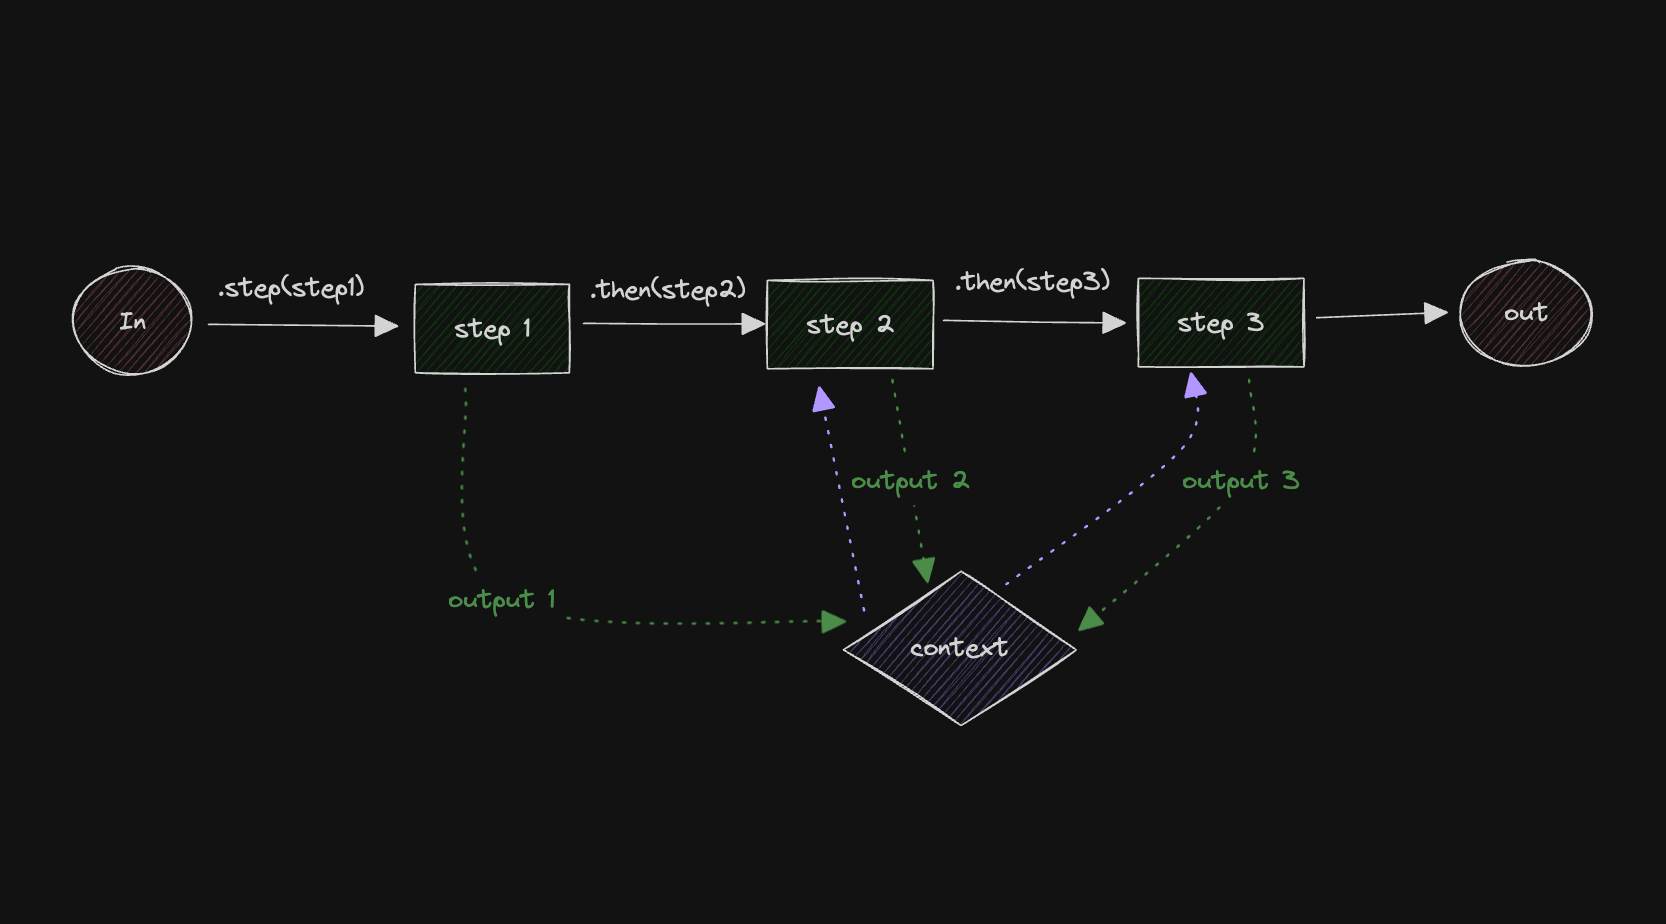
Control Flow DiagramDirect link to Control Flow Diagram
This example shows how to chain workflow steps by using the then method demonstrating how to pass data between sequential steps and execute them in order.
Here's the control flow diagram:
Creating the StepsDirect link to Creating the Steps
Let's start by creating the steps and initializing the workflow.
import { LegacyStep, LegacyWorkflow } from "@mastra/core/workflows/legacy";
import { z } from "zod";

const stepOne = new LegacyStep({
  id: "stepOne",
  execute: async ({ context }) => ({
    doubledValue: context.triggerData.inputValue * 2,
  }),
});

const stepTwo = new LegacyStep({
  id: "stepTwo",
  execute: async ({ context }) => {
    if (context.steps.stepOne.status !== "success") {
      return { incrementedValue: 0 };
    }

    return { incrementedValue: context.steps.stepOne.output.doubledValue + 1 };
  },
});

const stepThree = new LegacyStep({
  id: "stepThree",
  execute: async ({ context }) => {
    if (context.steps.stepTwo.status !== "success") {
      return { tripledValue: 0 };
    }

    return { tripledValue: context.steps.stepTwo.output.incrementedValue * 3 };
  },
});

// Build the workflow
const myWorkflow = new LegacyWorkflow({
  name: "my-workflow",
  triggerSchema: z.object({
    inputValue: z.number(),
  }),
});
Chaining the Steps and Executing the WorkflowDirect link to Chaining the Steps and Executing the Workflow
Now let's chain the steps together.
// sequential steps
myWorkflow.step(stepOne).then(stepTwo).then(stepThree);

myWorkflow.commit();

const { start } = myWorkflow.createRun();

const res = await start({ triggerData: { inputValue: 90 } });
View source on GitHub
Workflows (Legacy)Direct link to Workflows (Legacy)
The following links provide example documentation for legacy workflows:
- Creating a Simple Workflow (Legacy)
- Parallel Execution with Steps
- Branching Paths
- Workflow (Legacy) with Conditional Branching (experimental)
- Calling an Agent From a Workflow (Legacy)
- Tool as a Workflow step (Legacy)
- Workflow (Legacy) with Cyclical dependencies
- Data Mapping with Workflow Variables (Legacy)
- Human in the Loop Workflow (Legacy)
- Workflow (Legacy) with Suspend and Resume