Build with AI
AI agents may not have up-to-date knowledge about Mastra's APIs, patterns, and best practices. These resources give your AI tools direct access to current Mastra documentation, enabling them to generate accurate code and help you build faster.
To give your agent access to Mastra's documentation, we recommend using skills. While the MCP docs server also provides this information, skills will perform better. Use the MCP docs server when you need its tools, e.g. the migration tool.
Mastra skillsDirect link to Mastra skills
Agent Skills are folders of instructions, scripts, and resources that agents can discover and use to do things more accurately and efficiently. Mastra skills contain setup instructions, best practices, CLI commands, and instructions on how to fetch up-to-date information from Mastra's documentation.
To install all available Mastra skills, run the following command:
- npm
- pnpm
- Yarn
- Bun
npx skills add mastra-ai/skills
pnpm dlx skills add mastra-ai/skills
yarn dlx skills add mastra-ai/skills
bun x skills add mastra-ai/skills
Mastra skills work with any coding agent that supports the Skills standard, including Claude Code, Cursor, Codex, OpenCode, and others.
They're also available on GitHub.
Update skillDirect link to Update skill
To update to the latest version of the Mastra skill, run:
- npm
- pnpm
- Yarn
- Bun
npx skills update mastra
pnpm dlx skills update mastra
yarn dlx skills update mastra
bun x skills update mastra
Mastra CLIDirect link to Mastra CLI
The Mastra CLI gives your coding agent a direct line to your Mastra runtime. Agents can invoke agents, run workflows, execute tools, inspect memory, run evals, and query traces and logs.
- npm
- pnpm
- Yarn
- Bun
npm install mastra@latest -g
pnpm add mastra@latest -g
yarn global add mastra@latest
bun add mastra@latest --global
For example, your coding agent can run an agent, then pull traces to inspect the results:
mastra api --url http://localhost:4111 agent run weather-agent '{"messages":"What is the weather in London?"}'
mastra api --url http://localhost:4111 trace list
Install the Mastra skills to teach your agent how to use the CLI. See the CLI commands reference for the full list of available commands.
Embedded package docsDirect link to Embedded package docs
Mastra packages ship with embedded documentation in dist/docs. When you install a Mastra package, your AI agent can read these files directly from node_modules to understand the package's APIs and patterns.
Each dist/docs includes:
SKILL.md: A skill file following the skills standardreferences/: A folder with documentation files relevant to the packageassets/SOURCE_MAP.json: A source map file linking public exports to their location innode_modules
Context filesDirect link to Context files
Mastra provides a root llms.txt file that contains an overview of all available documentation pages. It doesn't provide an llms-full.txt file as it's not useful to have all documentation in one file.
Instead, each documentation page has its own llms.txt file. These files are streamlined markdown files. At the end of each docs page you'll find a link to the corresponding llms.txt file.
Add /llms.txt to any Mastra docs URL to access it. You can also request it by adding a .md extension to the end of the URL.
Examples for the introduction page:
Mastra's documentationDirect link to Mastra's documentation
In addition to the context files each documentation page also features a "Copy markdown" button at the top of the page. It'll copy the streamlined markdown version to your clipboard. Beside it, you'll find a dropdown menu to open the page on GitHub, in ChatGPT, Claude, and others.
MCP docs serverDirect link to MCP docs server
The @mastra/mcp-docs-server package provides direct access to Mastra’s full documentation via the Model Context Protocol (MCP). It works with Cursor, Windsurf, Cline, Claude Code, VS Code, Codex or any tool that supports MCP.
These tools are designed to help agents retrieve precise, task-specific information — whether you're adding a feature to an agent, scaffolding a new project, or exploring how something works.
In this guide you'll learn how to add Mastra's MCP server to your AI tooling.
InstallationDirect link to Installation
create-mastraDirect link to create-mastra
During the interactive create-mastra wizard, choose one of your tools in the MCP step.
Manual setupDirect link to Manual setup
If there are no specific instructions for your tool below, you may be able to add the MCP server with this common JSON configuration anyways.
{
  "mcpServers": {
    "mastra": {
      "type": "stdio",
      "command": "npx",
      "args": ["-y", "@mastra/mcp-docs-server@latest"]
    }
  }
}
Claude Code CLIDirect link to Claude Code CLI
Install using the terminal command:
claude mcp add --scope project mastra -- npx -y @mastra/mcp-docs-server@latest
This creates a project-scoped .mcp.json file if one doesn't already exist. You can use the same command when using Claude Code as a Visual Studio Code extension.
More info on using MCP servers with Claude Code
OpenAI Codex CLIDirect link to OpenAI Codex CLI
-
Register it from the terminal:
codex mcp add mastra-docs -- npx -y @mastra/mcp-docs-server@latest -
Run
codex mcp listto confirm the server shows asenabled.
More info on using MCP servers with OpenAI Codex
CursorDirect link to Cursor
Install by selecting the button below:

If you followed the automatic installation, you'll see a popup when you open cursor in the bottom left corner to prompt you to enable the Mastra Docs MCP Server.
More info on using MCP servers with Cursor
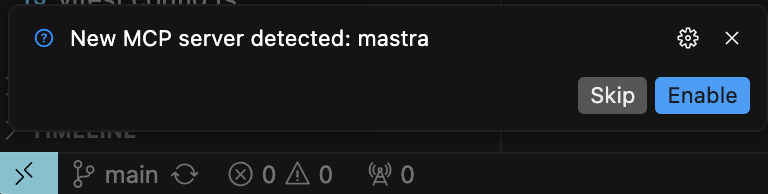
AntigravityDirect link to Antigravity
Google Antigravity is an agent-first development platform that supports MCP servers for accessing external documentation, APIs, and project context.
-
Open your Antigravity MCP configuration file:
- Click on Agent session and select the “…” dropdown at the top of the editor’s side panel, then select MCP Servers to access the MCP Store.
- You can access it through the MCP Store interface in Antigravity
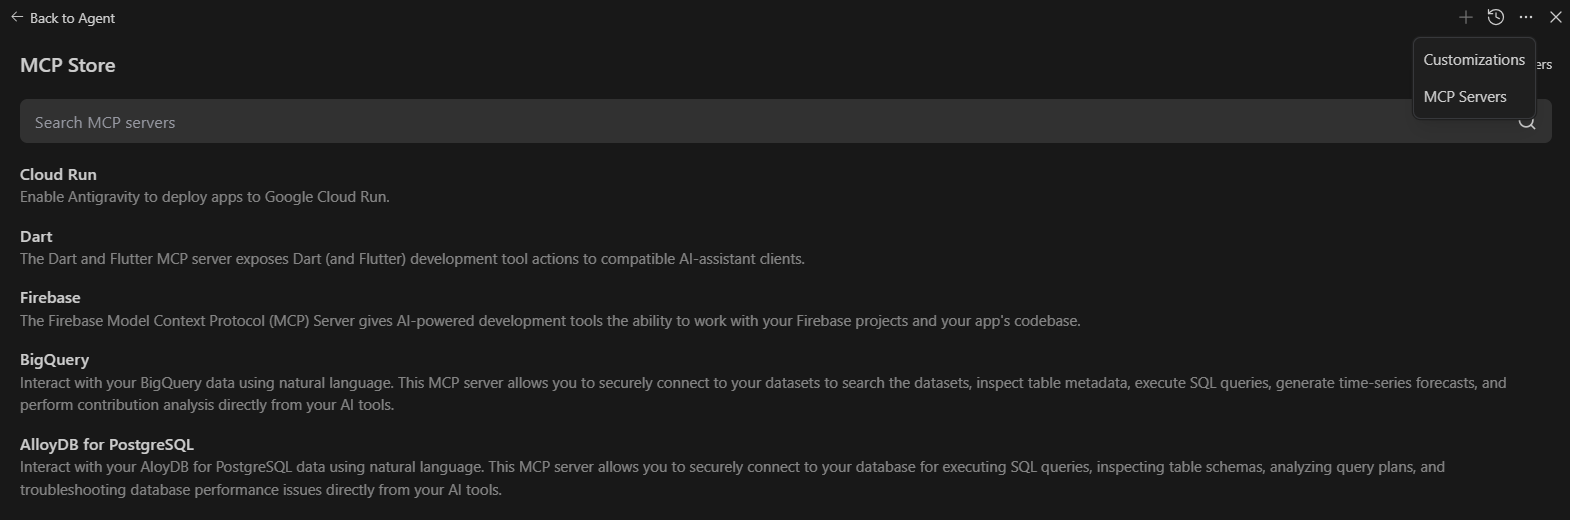
-
To add a custom MCP server, select Manage MCP Servers at the top of the MCP Store and select View raw config in the main tab.
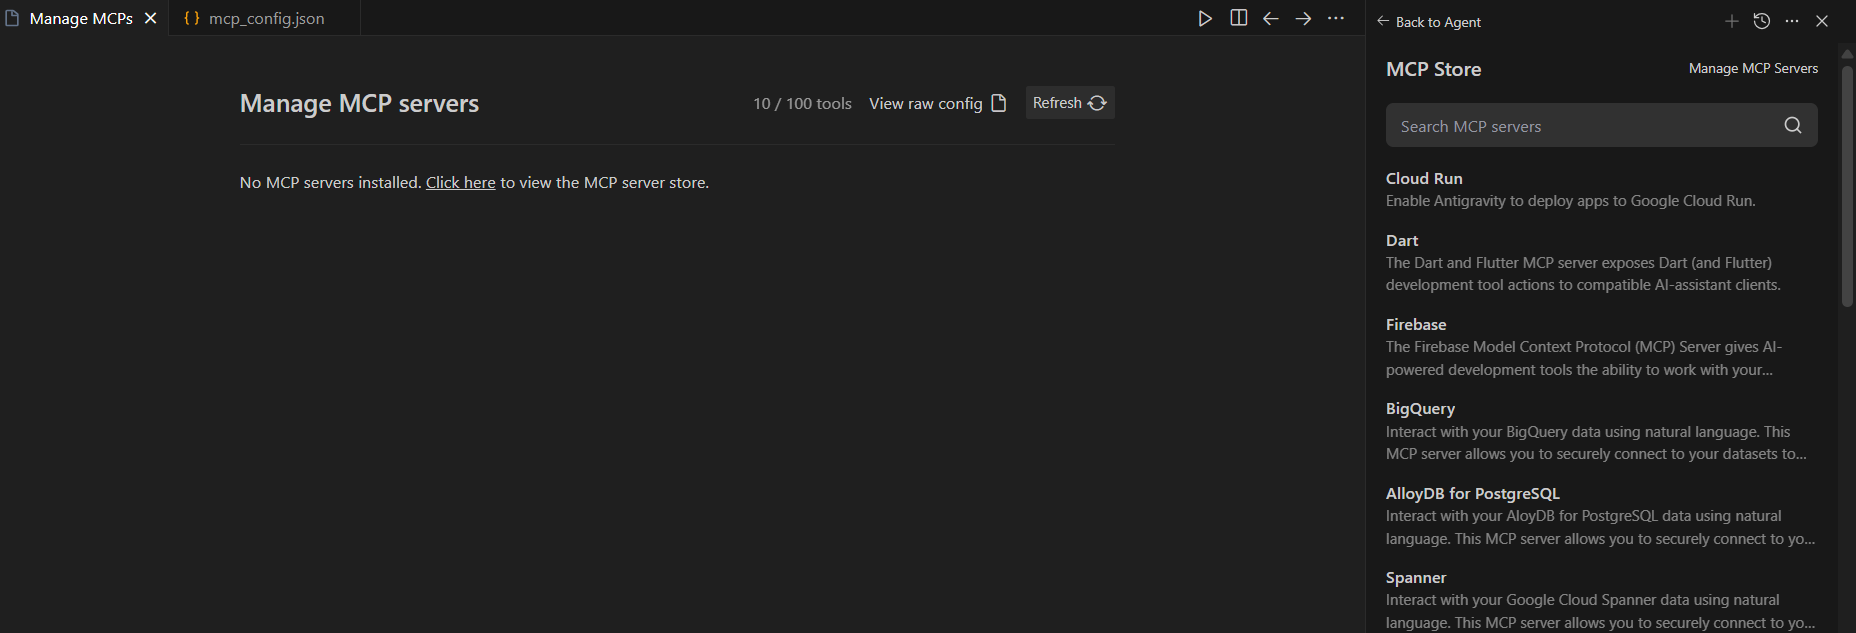
-
Add the Mastra MCP server configuration:
{
  "mcpServers": {
    "mastra-docs": {
      "command": "npx",
      "args": ["-y", "@mastra/mcp-docs-server"]
    }
  }
} -
Save the configuration and restart Antigravity
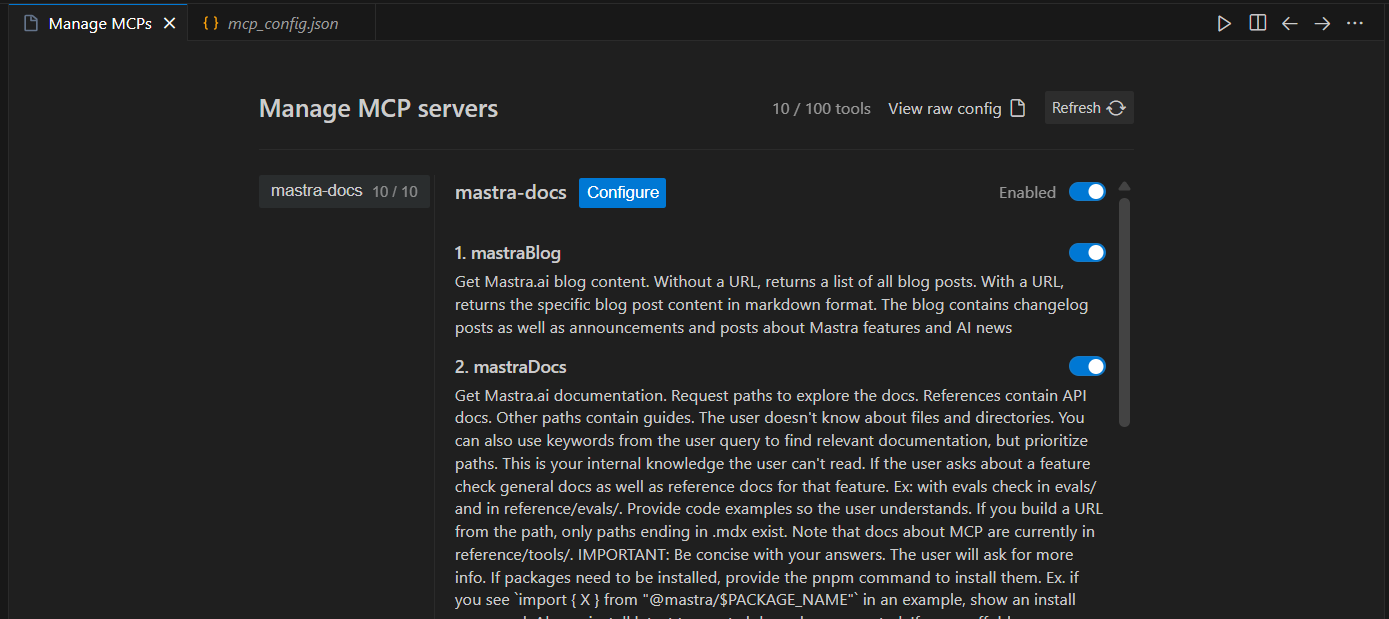
Once configured, the Mastra MCP server exposes the following to Antigravity agents:
- Indexed documentation and API schemas for Mastra, enabling programmatic retrieval of relevant context during code generation
- Access to example code snippets and usage patterns stored in Mastra Docs
- Structured data for error handling and debugging references in the editor
- Metadata about current Mastra project patterns for code suggestion and completion
The MCP server will appear in Antigravity's MCP Store, where you can manage its connection status and authentication if needed.
More info on using MCP servers with Antigravity
Visual Studio CodeDirect link to Visual Studio Code
-
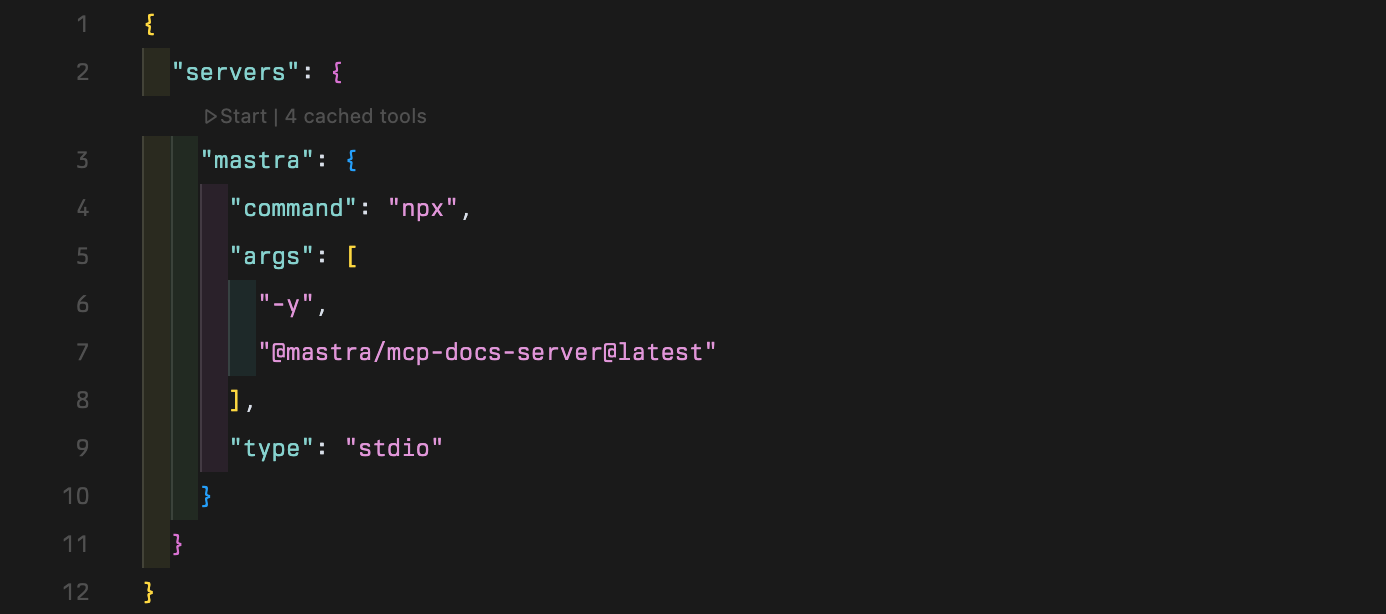
Create a
.vscode/mcp.jsonfile in your workspace -
Insert the following configuration:
.vscode/mcp.json{
"servers": {
"mastra": {
"type": "stdio",
"command": "npx",
"args": ["-y", "@mastra/mcp-docs-server@latest"]
}
}
}
Once you installed the MCP server, you can use it like so:
-
Open VSCode settings.
-
Navigate to MCP settings.
-
Click "enable" on the Chat > MCP option.

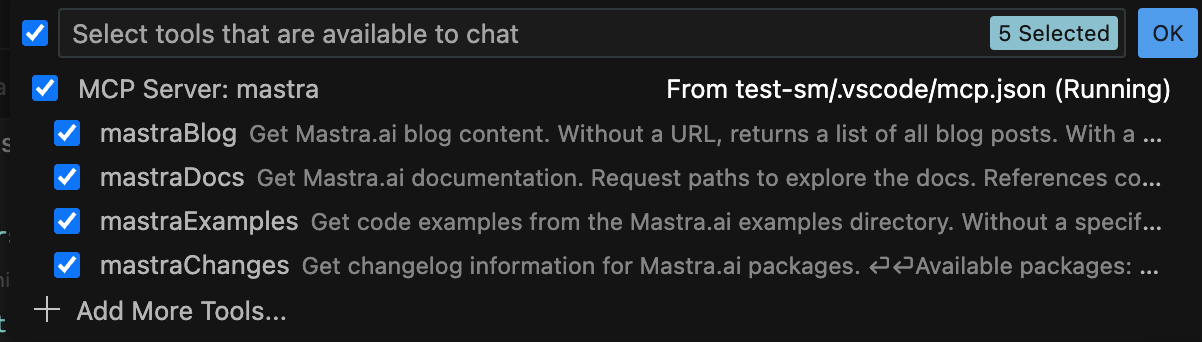
MCP only works in Agent mode in VSCode. Once you are in agent mode, open the mcp.json file and select the "start" button. Note that the "start" button will only appear if the .vscode folder containing mcp.json is in your workspace root, or the highest level of the in-editor file explorer.
After starting the MCP server, select the tools button in the Copilot pane to see available tools.
More info on using MCP servers with Visual Studio Code
WindsurfDirect link to Windsurf
-
Open
~/.codeium/windsurf/mcp_config.jsonin your editor -
Insert the following configuration:
~/.codeium/windsurf/mcp_config.json{
"mcpServers": {
"mastra": {
"command": "npx",
"args": ["-y", "@mastra/mcp-docs-server@latest"]
}
}
} -
Save the configuration and restart Windsurf
More info on using MCP servers with Windsurf
OpenCodeDirect link to OpenCode
You can define MCP servers in your OpenCode configuration under mcp. Create an opencode.jsonc file in your project root with the following content:
{
  "$schema": "https://opencode.ai/config.json",
  "mcp": {
    "mastra": {
      "type": "local",
      "command": ["npx", "-y", "@mastra/mcp-docs-server@latest"],
      "enabled": true
    }
  }
}
More info on using MCP servers with OpenCode
ZedDirect link to Zed
- Open
~/.config/zed/settings.jsonin your editor - Insert the following configuration:
{
  "context_servers": {
    "Mastra": {
      "command": "npx",
      "args": ["-y", "@mastra/mcp-docs-server@latest"]
    }
  }
}
UsageDirect link to Usage
Once configured, you can ask your AI tool questions about Mastra or instruct it to take actions. For these steps, it'll take the up-to-date information from Mastra's MCP server.
Add features:
- "Add evals to my agent and write tests"
- "Write me a workflow that does the following
[task]" - "Make a new tool that allows my agent to access
[3rd party API]"
Ask about integrations:
- "Does Mastra work with the AI SDK?
How can I use it in my
[React/Svelte/etc]project?" - "Does Mastra support
[provider]speech and voice APIs? Show me an example in my code of how I can use it."
Debug or update existing code:
- "I'm running into a bug with agent memory, have there been any related changes or bug fixes recently?"
- "How does working memory behave in Mastra and how can I use it to do
[task]? It doesn't seem to work the way I expect." - "I saw there are new workflow features, explain them to me and then update
[workflow]to use them."
TroubleshootingDirect link to Troubleshooting
-
Server Not Starting
- Ensure npx is installed and working.
- Check for conflicting MCP servers.
- Verify your configuration file syntax.
-
Tool Calls Failing
- Restart the MCP server and/or your IDE.
- Update to the latest version of your IDE.