# Studio
Studio provides an interactive UI for building and testing your agents, along with a REST API that exposes your Mastra application as a local service. This lets you start building without worrying about integration right away.
As your project evolves, Studio's development environment helps you iterate on your agent quickly. Meanwhile, Observability and Scorer features give you visibility into performance at every stage.
To get started, run Studio locally using the instructions below, or [create a project in Mastra Cloud](https://mastra.ai/docs/mastra-cloud/setup) to collaborate with your team.
[YouTube video player](https://www.youtube-nocookie.com/embed/ojGu6Bi4wYk)
## Start Studio
If you created your application with `create mastra`, start the local development server using the `dev` script. You can also run it directly with `mastra dev`.
**npm**:
```bash
npm run dev
```
**pnpm**:
```bash
pnpm run dev
```
**Yarn**:
```bash
yarn dev
```
**Bun**:
```bash
bun run dev
```
Once the server's running, you can:
- Open the Studio UI at to test your agent interactively.
- Visit to discover and interact with the underlying REST API.
## Studio UI
The Studio UI provides an interactive development environment for you to test your agents, workflows, and tools, observe exactly what happens under the hood with each interaction, and tweak things as you go.
### Agents
Chat with your agent directly, dynamically switch [models](https://mastra.ai/models), and tweak settings like temperature and top-p to understand how they affect the output.
When you interact with your agent, you can follow each step of its reasoning, view tool call outputs, and [observe](#observability) traces and logs to see how responses are generated. You can also attach [scorers](#scorers) to measure and compare response quality over time.
### Workflows
Visualize your workflow as a graph and run it step by step with a custom input. During execution, the interface updates in real time to show the active step and the path taken.
When running a workflow, you can also view detailed traces showing tool calls, raw JSON outputs, and any errors that might have occurred along the way.
### Tools
Run tools in isolation to observe their behavior. Test them before assigning them to your agent, or isolate them to debug issues should something go wrong.
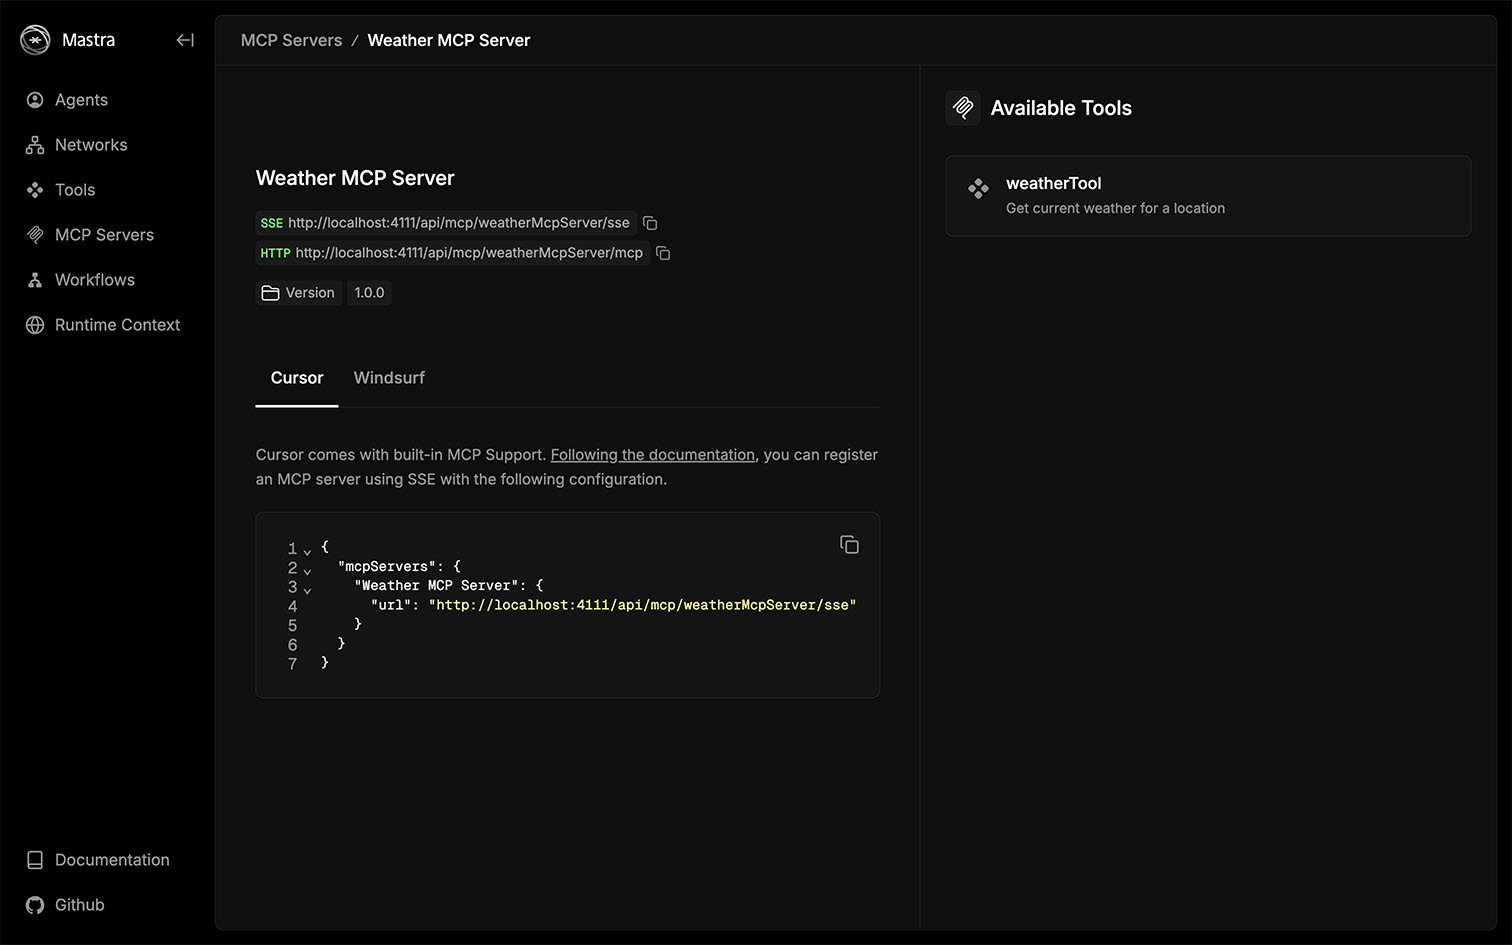
### MCP
List the MCP servers attached to your Mastra instance and explore their available tools.
### Observability
When you run an agent or workflow, the Observability tab displays traces that highlight the key AI operations such as model calls, tool executions, and workflow steps. Follow these traces to see how data moves, where time is spent, and what's happening under the hood.

Tracing filters out low-level framework details so your traces stay focused and readable.
### Scorers
The Scorers tab displays the results of your agent's scorers as they run. When messages pass through your agent, the defined scorers evaluate each output asynchronously and render their results here. This allows you to understand how your scorers respond to different interactions, compare performance across test cases, and identify areas for improvement.
## REST API
The local development server exposes a complete set of REST API routes, allowing you to programmatically interact with your agents, workflows, and tools during development. This is particularly helpful if you plan to deploy the Mastra server, since the local development server uses the exact same API routes as the [Mastra Server](https://mastra.ai/docs/server/mastra-server), allowing you to develop and test against it with full parity.
You can explore all available endpoints in the OpenAPI specification at , which details every endpoint and its request and response schemas.
To explore the API interactively, visit the Swagger UI at . Here, you can discover endpoints and test them directly from your browser.
> **Info:** The OpenAPI and Swagger endpoints are disabled in production by default. To enable them, set [`server.build.openAPIDocs`](https://mastra.ai/reference/configuration) and [`server.build.swaggerUI`](https://mastra.ai/reference/configuration) to `true` respectively.
## Configuration
By default, Studio runs at . You can change the [`host`](https://mastra.ai/reference/configuration), [`port`](https://mastra.ai/reference/configuration), and [`studioBase`](https://mastra.ai/reference/configuration) in the Mastra server configuration. This allows you to customize where and how Studio is hosted.
Furthermore, Mastra supports local HTTPS development through the [`--https`](https://mastra.ai/reference/cli/mastra) flag, which automatically creates and manages certificates for your project. When you run `mastra dev --https`, a private key and certificate are generated for localhost (or your configured host). Visit the [HTTPS reference](https://mastra.ai/reference/configuration) to learn more.
## Next steps
- Learn more about Mastra's suggested [project structure](https://mastra.ai/docs/getting-started/project-structure).
- Integrate Mastra with your frontend framework of choice - [Next.js](https://mastra.ai/guides/getting-started/next-js), [React](https://mastra.ai/guides/getting-started/vite-react), or [Astro](https://mastra.ai/guides/getting-started/astro).